

You can rebuild all eXist packages from the standard distribution or the subversion repository. You can even create a new distribution from the one you installed. For example, assume you installed eXist using the installer GUI, but you need to have an exist.war package for deployment within a different servlet engine. Just call the main build script (build.sh or build.bat) and pass it the target dist-war:
This will create a fresh .war archive in the dist directory.
To be able to use the build system, you need to include the "source" module when selecting installable packages in the installer GUI.
eXist relies on Ant for all compile and build tasks. Ant is included in the distribution (directory tools/ant). As already mentioned above, there are two shell scripts to start Ant: build.sh or build.bat. The shell scripts will take care to create a proper command line to launch Java with the Ant version included in the distribution.
Calling Ant without further argument will compile the sources and create the main jar-files (exist.jar, exist-optional.jar, start.jar).
lists the available build targets. Passing one of these as argument to ant will call execute the corresponding target. The main targets are:
| jar | The default: compiles the source and creates eXist's main jar files |
| samples | Builds the examples and packs them into examples.jar |
| javadocs | Call javadoc to create the API docs |
| docs | Create a static HTML version of the documentation |
| dist-war | Packages eXist into a .war file for deployment within a servlet engine |
| installer | Creates a new installer package based on IzPack |
| test | Runs all tests in the test suite. This may take several minutes. |
| xquery | Regenerate the XQuery parser code with ANTLR (only required if you change src/org/exist/xquery/parser/XQuery.g). |
Since spring 2006, the entire code base of eXist is managed by the Subversion repository at Sourceforge. Before that we used CVS, which had a few issues, especially due to the separation into a developer's and anonymous server. Using Subversion should be much simpler, faster and more reliable.
Fortunately, you don't need to be a hardcore Java developer to use the SVN version of eXist. In general, we try to keep the development version in a consistent state. The code should always compile and run the test cases, though temporary failures are possible, especially while a larger update is in progress.
The repository root URL is:
Please note you have to use https, not http.
The current development trunk is at:
This is the URL you will normally use for a checkout of the main eXist development tree.
There are many Subversion clients to choose from. If you want to actively contribute to eXist or otherwise work on eXist's source code, we recommend to use eclipse to check out the sources (see below) and setup a project. Otherwise, you can use any other SVN client. On Linux, I prefer the plain command line. For example, the following command checks out the main development trunk into a directory called eXist-trunk:
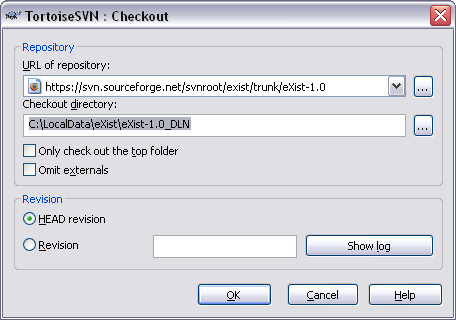
A good choice on the Windows platform is Tortoise SVN. Tortoise is an extension to the windows shell. The following screenshot shows the checkout dialog:
The repository already contains project configuration files for eclipse, so setting up the project should be pretty simple: you normally don't need to change much in order to dive into the source code (though you may need some customizations to build and run directly from within eclipse).
To access a Subversion repository from within eclipse, you need to install the subclipse plugin first! Please follow the install instructions available there.
Once you installed subclipse, change to the perspective: "SVN Repository Exploring". In the "SVN Repository" tab of the left view, right click into the empty space and select , then . In the appearing dialog, enter the URL of the eXist development trunk:

The URL will now be listed in the "SVN Repository" view. Right click the URL and select . A progress window appears, saying that eclipse is "getting remote info". Once it finished, you should see the following dialog:
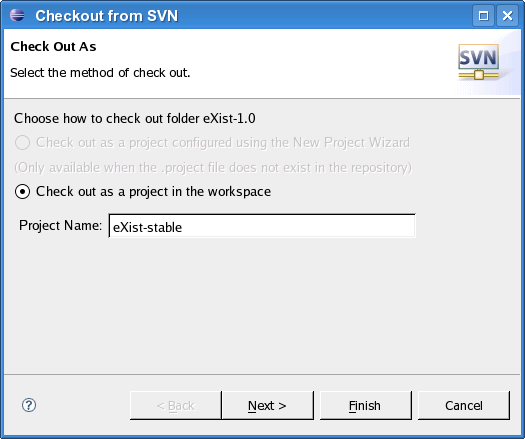
Just press unless you want to specify a different directory or checkout a certain tag.
